Let’s talk about how to create better before-and-after photos.
In the video below, you’ll see the step-by-step way to take a ho-hum before and after photo and turn it into something that grabs a visitor’s attention and actually gets them to take action on what you want them to do.
When it comes to before and after photos, they are a huge part of showing proof that what you do gets results.
They’re tried and true, and they work.
Even the infomercials that spend millions of dollars use them because they work.
But as time goes on, attention spans are getting shorter and shorter.
And people are so used to seeing before and after photos that they have started developing…
Before and after blindness.
This means they’re just glossing over them and not paying as much attention to them as they used to.
Unless they’re REALLY interested in a program and are looking for serious proof.
To keep that from happening to your before and after photos, you’ll have to do something to make them stand out.
Sure, adding a border, colors, or even a logo will help.
But what we’re talking about here is one more step to really get them to grab a visitor’s attention.
And no, this step doesn’t require any crazy software, tech knowledge, or hours of your time.
It involves taking one before and after photo of a client, loading it into Canva, and then spending a few minutes adding a few “tweaks.” And that’s it.
When it’s done, it’ll stand out over the original photo, and it’ll tell any visitor who sees it what you want them to do next.
AKA – a call to action.
And when you do this and combine them with real testimonial videos, you’ve got something very powerful.
And in the video that you see here, you’ll see how to create better before and after photos using Canva.
Oh, and one last thing…
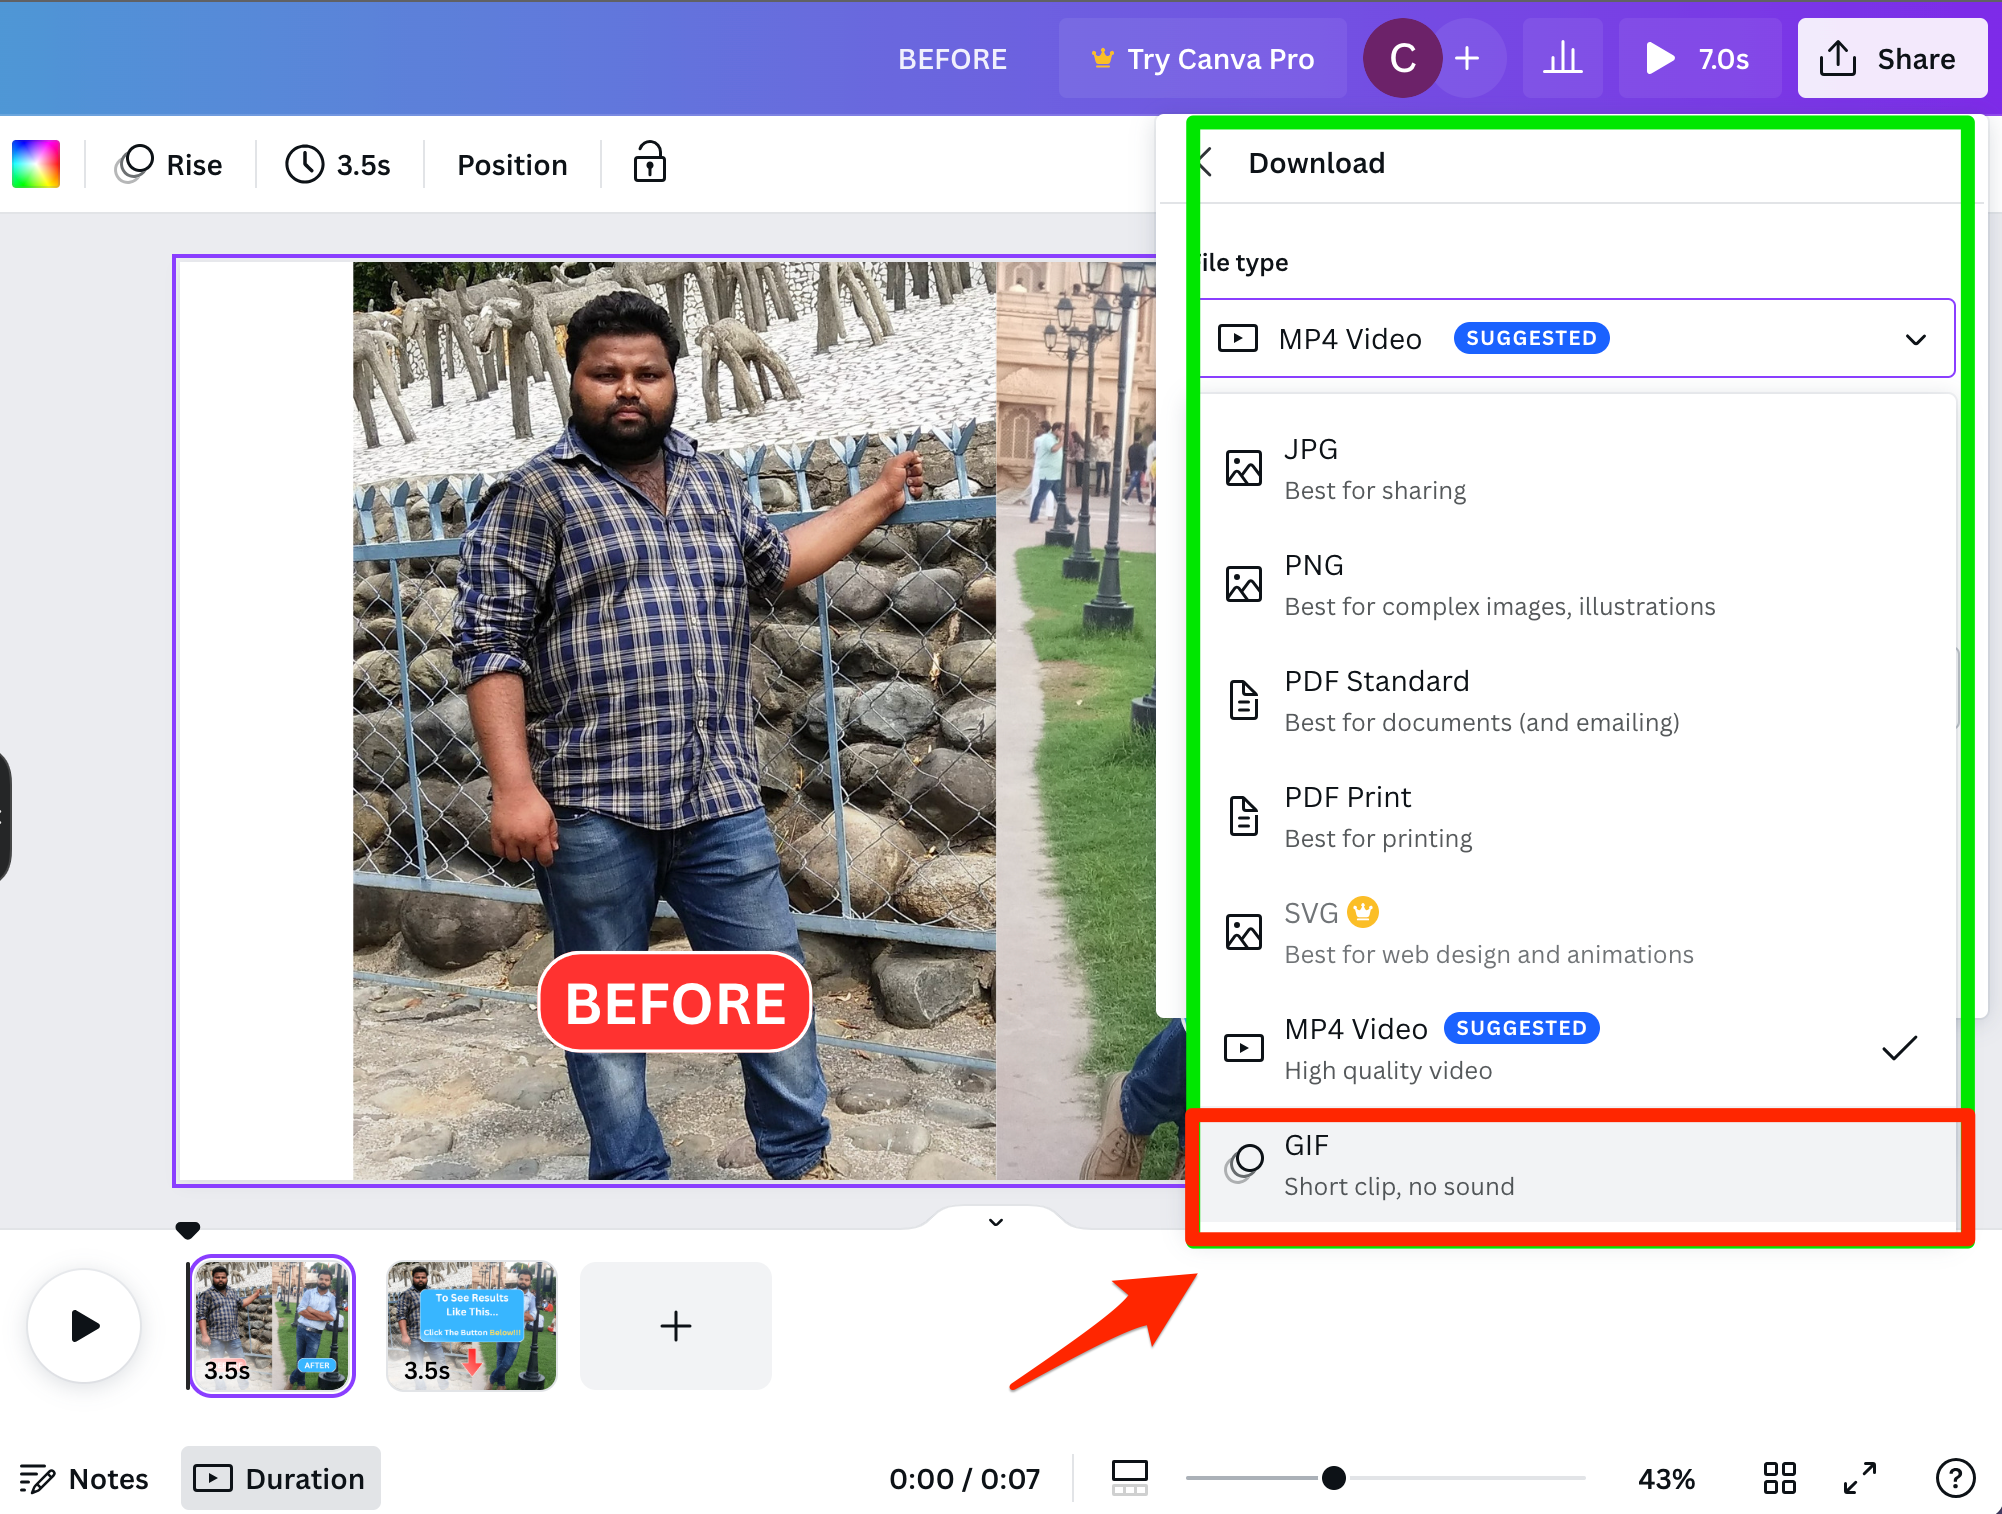
I forgot to add an important step in the video.
That is how to export the video.
If you want to use it on any website, landing page, sales page, etc…
Make sure you export it as a .gif file.
If you want to upload it to YouTube or any social media site, then exporting as an MP4 will work.
So that’s how to create better before-and-after photos.
If you have any questions, let me know.
If you’d like to transform your before and after photos but don’t have the time to do it, just click here and let me know, and I’ll do them for you.